

Looking for the ultimate no-fuss dessert to wow your taste buds and impress guests? The classic rocky road recipe is the perfect sweet treat that ticks all boxes — rich chocolate, fluffy marshmallows, and crunchy nuts all mingling in a smooth, melt-in-your-mouth bite. This no-bake delight brings together nostalgia and ease, making it a star contender for quick weekend projects or last-minute gift ideas. Whether you’re craving a chocolate fix after a hectic day or planning a dessert tray for a festive gathering, this recipe offers maximum sweetness with zero oven time, let alone complications. Get ready to dive into a homemade treat that’s deceptively simple but incredibly satisfying! 🍫✨
Why rocky road candy stands out:
- 🎉 Absolute no-bake convenience – just mix and chill.
- 🍬 Perfect combo of chewy marshmallows, crunchy nuts, and velvety chocolate.
- 💰 Budget-friendly ingredients readily found in any pantry.
- 👨👩👧 Kid-friendly kitchen fun without mess or stress.
- 🎁 Great for gifting — pop some squares into a cute tin, and you’re golden.
what makes this rocky road recipe so irresistible and fuss-free?
At its core, the magic behind this rocky road recipe lies in its impeccable balance of textures and flavors. Imagine biting into soft, sweet marshmallows layered within chunks of rich, semisweet chocolate that’s been infused with just a hint of vanilla. Now add the delightful crunch from roasted pecans or walnuts and you’re set! It’s a no-bake dessert that feels indulgent without the fuss of complicated steps or countless ingredients. Plus, it evokes a warm, nostalgic feeling – like the childhood memories of sneaking a taste from the bowl as the magic happens.
The real clincher? You don’t need a fancy oven or tons of equipment. Melt your chocolate and peanut butter together in a microwave-safe bowl with brief bursts, stir until silky, then gently fold in those iconic mini marshmallows and nuts. Pour into a parchment-lined pan for easy removal, chill, and voilà — homemade rocky road ready to cut and serve. Clean-up is a breeze since all the action happens in one bowl. Whether you’re new to homemade desserts or an experienced sweet maker, this recipe is a crowd-pleaser that rarely disappoints.
Fans of hassle-free sweets will also swoon over related recipes like chocolate peanut butter oatmeal cookies or easy homemade coconut clusters. These no-bake sensations share the same love for simplicity and flavor-packed bites – perfect companions to your rocky road adventures!
Discover more no-bake chocolate treats that hit the sweet spot.
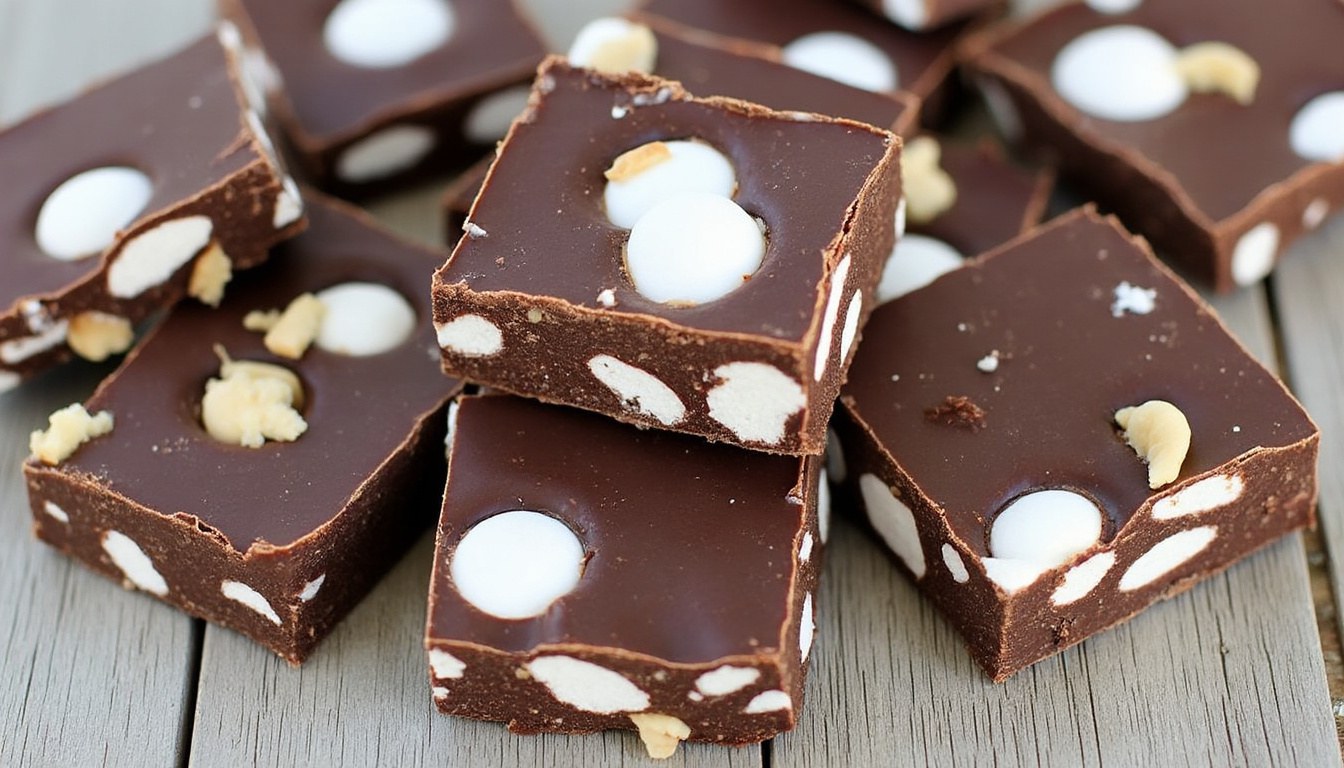
what you need to gather for the best no-bake rocky road dessert?
Gathering your ingredients is like preparing for a mini celebration of sweet, crunchy, and creamy textures. You’ll keep it simple but delicious with these staples:
- Semisweet chocolate chips (about 3 cups) – provides that luscious, rich chocolate base that melts beautifully.
- Creamy peanut butter (optional 1/2 cup) – for a smooth, nutty depth that complements the chocolate perfectly.
- Vanilla extract (a teaspoon) – just a splash to enhance and brighten all the flavors involved.
- Mini marshmallows (2 cups) – the star of chewy sweetness, classic to rocky road.
- Chopped nuts (1 cup) – walnuts, pecans, or almonds work wonders to add crunch and an earthy balance.
Nothing extravagant here — just ingredients you can easily find in any grocery store these days. And if you’re feeling adventurous, swapping peanut butter for almond or sunflower butter works just as well! You can even make it lower carb by choosing sugar-free chocolate chips — total game changer for the health-conscious chocolate lover. 🌰🍫
| Ingredient | Purpose | Tips for best results |
|---|---|---|
| Semisweet chocolate chips | Base binding and chocolate flavor | Melt gently to avoid grainy texture |
| Creamy peanut butter | Adds creaminess and nuttiness | Optional — adds smoothness |
| Mini marshmallows | Chewy sweetness and texture | Use mini for even distribution |
| Chopped nuts (walnuts/pecans/almonds) | Crunch and flavor contrast | Toast nuts at 350°F for 5-7 mins to boost aroma |
| Vanilla extract | Flavor enhancer | A small splash goes a long way |
how to whip up your rocky road no-bake chocolate treat in simple steps?
The beauty of this recipe is the ease it invites. Taking just a handful of steps, it’s designed for maximum flavor with minimal fuss, perfect for busy nights or spontaneous dessert needs. Ready to dive into the easiest chocolate creation of your life? Here’s the lowdown:
- Line a pan with parchment paper: Choose an 8×8-inch pan for the perfect thickness.
- Melt chocolate and peanut butter: Use short bursts in the microwave, stirring frequently until silky smooth.
- Add vanilla extract: Stir it in at this point to brighten the chocolate’s richness.
- Fold in marshmallows and nuts: Gently mix so marshmallows stay fluffy and nuts distribute evenly without sinking.
- Pour and spread: Transfer the mixture into the pan, spreading evenly with a spatula.
- Chill: Refrigerate for about 30 minutes to allow the candy to set nicely.
- Slice and share: Use a warm knife dipped in hot water for neat, easy cuts.
Just like that, you’ve got a pan full of sweet perfection, ready to be enjoyed at any time. Many love to stash some squares in the freezer for late-night cravings — trust me, it’s a lifesaver when the sweet tooth attacks at midnight! If you want to see more amazing no-bake ideas, check out this creative chocolate biscuit fridge cake — another winner for no-oven dessert fans.
what tasty variations and clever swaps make rocky road your own?
One of the coolest things about rocky road is how wildly adaptable it is. Feel like switching up some ingredients or adding a new twist? The recipe invites experimentation; variety is the name of the game!
- Chocolate switch-up: Use milk chocolate for creamier sweetness or dark chocolate for a richer, less sugary bite.
- Nut butter alternatives: Swap peanut for almond or sunflower butter to cater for allergies or simply shake things up.
- Crunch lovers rejoice: Add crushed pretzels, graham cracker pieces, or dried cranberries for a new texture kick.
- Flavor infusions: Try adding 1 teaspoon of mint extract for a refreshing Rocky Road mint version, or sprinkle some sea salt atop the chocolate right before chilling for a salty-sweet balance.
- Go s’mores-style: Toss in broken graham crackers alongside nuts and marshmallows for a campfire-inspired treat.
For a full dive on creative treats and substitutions, see the extensive ideas on this fabulous recipe site — trust me, you won’t run out of inspiration anytime soon!
Here’s a quick peek at how swaps stack up nutritionally and flavor-wise:
| Variation | Flavor Profile | Texture Impact | Best For |
|---|---|---|---|
| Mint Rocky Road | Fresh, cool chocolate mint | Soft marshmallow with minty notes | Fans of refreshing desserts |
| S’mores Rocky Road | Classic campfire sweetness | Crunchy from crackers & chewy marshmallows | Outdoor parties & kids |
| Sea Salt Rocky Road | Sweet-salty contrast | Soft but crunchy salt flakes atop | Gourmet twist seekers |
| Nut-Free | Pure chocolate & marshmallow focus | Soft, smooth without crunch | Allergy sensitive |
how to keep your rocky road fresh and delicious for longer?
One genius aspect of rocky road candy: it stores exceptionally well, making it a great make-ahead treat for parties or sweet emergencies. Here’s how to keep your creations at their best:
- 🥶 Refrigerate: Store in an airtight container in the fridge for up to a week. The cooler temperature helps keep the chocolate firm and the marshmallows perfectly chewy.
- ❄️ Freeze: For longer keeping, freeze squares in a single layer with parchment paper between layers to avoid sticking. They’ll last for up to 2 months and thaw quickly when you’re ready to indulge.
- 🧊 Cut cleanly: Dip your knife in hot water before each slice for sharp, clean cuts without crumbly pieces.
- 📦 Packaging tips: Use parchment paper or wax paper between layers when storing to make grabbing squares hassle-free.
Not just a dessert but a handy staple for busy kitchens — these storage hacks will keep your sweet stash ready for whenever the craving hits. Want to explore more handy storage and prep hacks for desserts? This guide on coffee walnut cake storage is a gem too!
In the overall, this rocky road recipe strikes a perfect balance between effort and decadence. It’s quick enough to whip up any day, yet impressive enough to pass as a thoughtful homemade gift or a crowd-pleasing dessert at parties. The way chocolate, marshmallows, and nuts come together is simply irresistible and leaves you craving that sweet mix of chewy, crunchy, and creamy every time. It also sparks creativity, welcoming substitutions and flair to match different tastes or dietary needs.
Thanks so much for diving into this chocolatey journey! 💖 Don’t forget to share your rocky road success stories and keep the sweet vibes rolling. Remember — life’s too short for boring desserts. Keep it sweet, keep it simple, and keep it rocky road! 🍫✨
Can I use large marshmallows instead of mini ones?
Absolutely! Just chop large marshmallows into smaller pieces so they distribute evenly throughout the rocky road and don’t overpower the texture.
How long does rocky road need to set before cutting?
About 30 minutes in the fridge is usually enough to firm up the rocky road, but leaving it longer or even chilling it overnight ensures clean cuts and firmer texture.
Is it possible to double the recipe for larger batches?
Yes! Simply use a 9×13-inch pan instead of the standard 8×8 and adjust chilling time accordingly. It’s a great way to stock up for bigger gatherings or gifts.
What nuts work best in rocky road?
Walnuts, pecans, and almonds are top choices since they bring a nice crunchy contrast and earthy flavor that balance the sweetness. Toasting them beforehand enhances aromas.
Can rocky road be made sugar-free or low-carb?
Definitely. Swap regular chocolate chips with sugar-free or keto-friendly chocolate and look for marshmallows made without added sugar to make it low-carb friendly.
