

Ever stumbled upon those delightfully rustic, crumbly treats called rock scones and wondered what makes them so special? These British gems are more than just your average baked goods—they are a full-on sensory experience, packing rough, golden crusts with juicy bursts of dried fruit inside. While they might look a bit rugged and imperfect, that’s exactly their charm! For fans of traditional baking or anyone craving a real tea time treat, mastering these fruit scones is an absolute must. From the simple, wholesome ingredients to that unmistakable rocky texture, these buns have a story as rich as their flavour. So, buckle up for a deeper dive into baking the perfect homemade scones, a dish that pulls you right into the heart of British cuisine with every bite.
Here’s a quick rundown of what’s at play in this classic recipe:
- 🥄 Rough, rustic texture that breaks the mold of perfectly formed scones
- 🍇 A generous fold of mixed dried fruits like sultanas, currants, and raisins
- ❄️ The magic of cold butter creating layers of flaky crumb
- 🔥 High-temp baking for a crisp, golden top with a tender inside
- ✨ Endless variations to tailor your flavors from zesty citrus to decadent chocolate
Ready to discover why these aren’t just any buns? Let’s get into the heart of a true British baking scones tradition and unlock the secrets you’ve been craving.
what makes rock scones the ultimate British fruited buns?
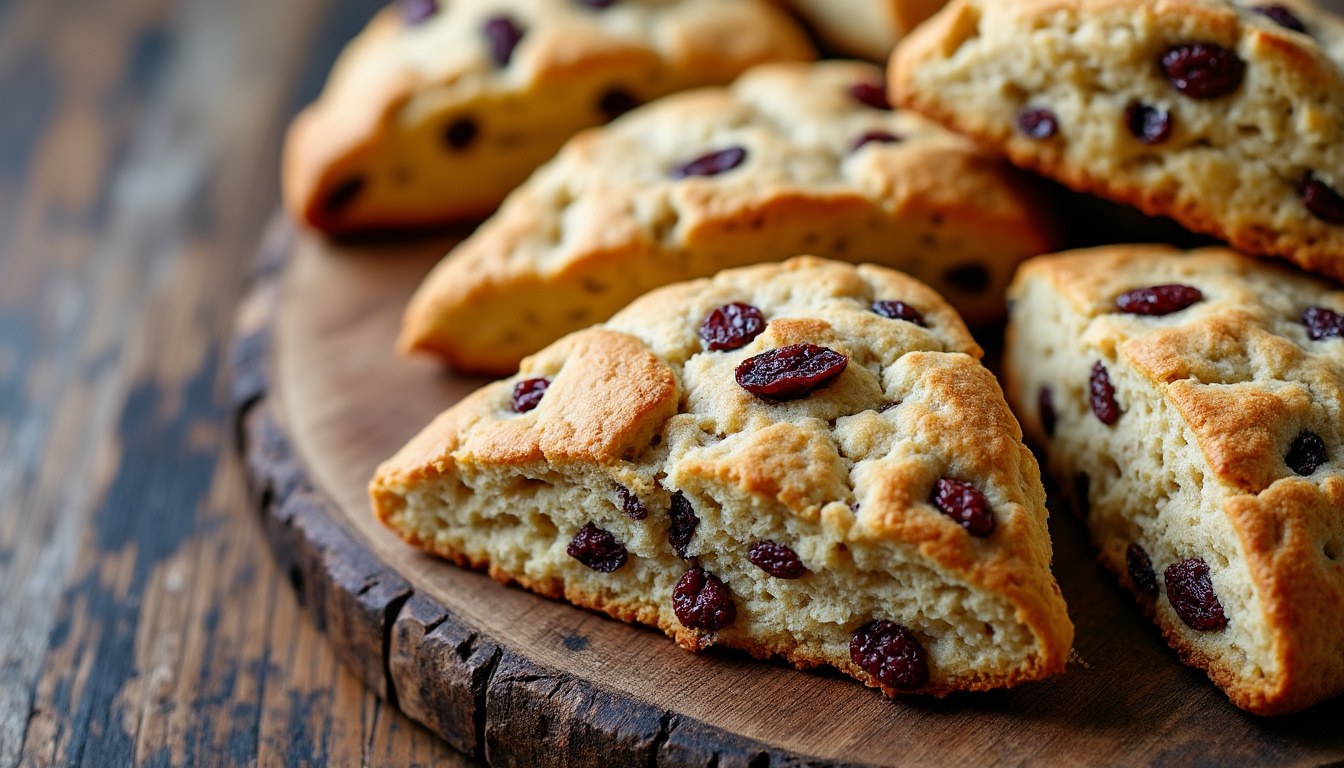
Rock scones—often lovingly called rock buns or rock cakes—offer a textured rebellion against the cookie-cutter, smooth, fluffy scones we’re used to seeing. Instead, they boast that distinctive rocky look that’s not only quirky but downright charming. Imagine a rustic little bun, with peaks and crags crackling lightly as you bite in, revealing moist pockets bursting with sweet, chewy fruit. That contrast—rough meets tender, crisp meets crumbly—is what makes them an absolute standout in British cuisine. Many swear that it’s this texture that defines a true fruit scone as opposed to more polished scones.
These treats trace their roots back to the Victorian era and gained massive popularity during wartime Britain when ingredients were stretched as far as possible. Their rusticity made them easy and inexpensive to bake, no fuss, no frills—but packed with enough flavor to brighten even the dullest teatime. Legend has it that during World War II, these cakes brought comfort and a sense of normality, and their recipe was passed down from generation to generation—thus embedding them in culinary history.
Their charm is truly amplified by how they embrace imperfection. Unlike delicate, meticulously shaped pastries, rock scones invite irregularity. You’ll often see uneven mounds on the tray and a texture that’s more crumbly than smooth. The secret lies in the technique of rubbing cold butter into flour, creating tiny pockets that puff up to flaky layers when baked.
They also stand out as a brilliant canvas for various dried fruits and spices. Classics include a mix of sultanas, raisins, currants, and sometimes zesty mixed peel, adding bursts of flavor and texture. Spice lovers will nod at the addition of mixed spice, a delightful blend that warms the palate subtly, making these scones perfect for colder afternoons. Not to mention, they’re incredibly versatile for experimentation.
In 2026, with the return of interest in slow food and comfort baking, rock scones have seen a resurgence amongst both home bakers and cafes championing traditional British recipes. Whether served with clotted cream or simple butter, these fruited buns remain an unrivaled tea time treat beloved across the UK—and far beyond.
which ingredients bring traditional rock scones to life?
It may seem like a humble list—but each ingredient in a rock scones recipe plays a starring role in crafting that unforgettable flavor and texture. The magic happens not in the complexity but in the quality and treatment of these essentials. Here’s the lowdown on what you’ll need and why they matter:
- 🌾 Flour: Typically, self-raising flour is the go-to, providing lightness and just enough rise. If plain flour is on hand, don’t stress—simply add baking powder to achieve the same effect.
- 🧈 Butter: The coldest butter possible is key. Rubbing it into the flour creates that crumbly, flaky structure baked rock scones are famous for. Don’t skip this step or use softened butter—that’s a rookie mistake that flattens your texture.
- 🍬 Sugar: Usually caster sugar, thanks to its fineness which blends effortlessly into the dough and adds subtle sweetness.
- 🍇 Dried fruit: Sultanas, raisins, and currants remain classics, but feel free to shake things up with cranberries, chopped apricots, or even cherries. They add juicy bursts that balance the crumbly richness.
- 🥚 Egg: Binds the dough, adds richness, and lends to that tender crumb.
- 🥛 Milk: Moistens while helping to bring all ingredients together.
- 🌿 Mixed Spice: This particular blend – think cinnamon, nutmeg, and cloves – brings a comforting warmth that complements the fruits seamlessly.
It’s worth emphasizing: the quality of these ingredients greatly affects the end product. Fresh flour, high-quality butter, and plump dried fruits really make your scones sing. The best bakeries and home cooks alike invest in these basics rather than overcomplicating things with fancy stuff.
For those exploring dietary needs or preferences, variations exist. Gluten-free self-raising flours can swap in without trouble, just keep an eye on dough moisture. Vegan bakers often substitute margarine for butter and use flaxseed “eggs” to keep things moist. The recipe’s straightforward nature invites plenty of adaptation, making rock scones endlessly approachable.
tips for choosing the perfect dried fruits 🍒
Picking dried fruit might seem like a minor detail, but it can totally make or break your rock buns. Here are some pointers to nail it:
- ✔️ Pick mixed fruits that are plump, not shriveled—look for vibrant color and moisture.
- ✔️ Consider soaking fruits in a little warm water or orange juice for 10 minutes before use to boost juiciness.
- ✔️ If you like a tart punch, add dried cranberries or chopped dried cherries for contrast.
- ✔️ Mix texture with chopped nuts (like walnuts or almonds) for extra crunch if you’re feeling adventurous.
Want to amp up your baking adventure? Try tweaking the spice mix or adding a splash of orange extract for a zesty twist. Trust me, the ingredient list isn’t just a checklist but the foundation of your scones’ soul.
what’s the secret technique for perfect rock scones?
Baking rock scones isn’t just throwing ingredients into a bowl. It’s about balancing technique, timing, and a light touch to maintain that crumbly charm. Here are the crucial pointers that make a world of difference, backed by trials, errors, and some hard-earned wisdom.
Keep the butter cold and rugged – this cannot be stressed enough. The cold butter, when rubbed into flour, creates tiny pockets that puff up during baking and generate that flaky, layered texture. Warm butter dissolves too early and gives a disappointingly doughy result. This step is the beating heart of the rustic crumb.
Avoid overmixing once the wet ingredients hit the dry mix. Yes, mixing activates gluten which is essential in bread but the enemy in rock scones. Overmix and you end up with tough, rock-hard buns. Ideal dough is just sticky enough to hold together—overworking it turns these treats into literal stones!
Shape with flair—not finesse. Rock buns wear their jagged edges proudly—they’re supposed to look uneven and natural. Use spoons or forks to dollop rough rounds onto your baking tray. Don’t fuss about perfection—the more uneven, the better that typical rock texture.
Watch your oven temperature like a hawk— rock scones bake best at a hot 200°C (or 180°C with fan ovens). The heat helps the buns rise quickly, locking in moisture and creating a golden crust on top while keeping the center tender. If the oven’s too low, you’ll get dull, flat, and tough results.
After baking, cooling the scones briefly on the tray prevents them from turning soggy underneath. And the golden rule? They taste best slightly warm—spread with butter or a generous dollop of clotted cream if you’ve got it. That melt-in-your-mouth moment rivals any fancy patisserie!
Here’s a quick checklist to make sure your baking scones adventure ends with success:
- ❄️ Use cold butter and work fast when rubbing it into flour
- 🤏 Mix ingredients only until just combined—no more!
- 🍽️ Shape rough, jagged mounds using spoons
- 🌡️ Preheat oven thoroughly to 200°C
- ⏰ Bake for 15–20 minutes until golden brown
- 🧈 Enjoy warm, fresh from oven with butter or clotted cream
how can variations take your rock scones to the next level?
While the classic recipe is a cherished British staple, rock scones invite a playground of creative twists that let you personalize this delightful fruited bun. A little experiment here and there can turn these simple cakes into something wow-worthy, perfect for impressing family and friends or just jazzing up your teatime game.
Here’s some flavor-fueled inspiration:
- 🍊 Citrus Rock Buns: Add the zest of lemon or orange for a zippy, fresh brightness that cuts through the sweetness.
- 🍫 Chocolate Chip Rock Buns: Swap out some dried fruit for generous chocolate chips for a decadent twist that kids and adults adore alike.
- 🍏 Spiced Apple Rock Buns: Toss in diced apples and bump the spice level with cinnamon, nutmeg, or allspice—hello autumn comfort food!
- 🧀 Cheese Rock Buns: Ditch the sugar and fruit for grated cheddar and a pinch of mustard powder, giving you savory scones with a lovely tang.
Not only do these variations keep the recipe fresh but also demonstrate the incredible versatility of these humble buns. Such inventive touches can easily elevate a batch from a simple British recipe to a signature creation.
And if you’re keen to mix baking styles, try combining rock scones with other easy no-bake dessert recipes for a fantastic afternoon tea spread. Or diversify your baking repertoire beyond buns by checking out classic favorites like salt dough art treats via this creative recipe.
how to store and enjoy rock scones for the best experience?
Rock scones are best consumed fresh, preferably warm, straight out of the oven. That said, life happens, and sometimes there are extras. Knowing how to store and reheat these treats will preserve their texture and flavor for days (or even months if frozen!).
Store smart to keep the crunch and crumbly joy alive:
| Storage Method 🍞 | Details 📋 | Best For 🕒 |
|---|---|---|
| Room Temperature (airtight container) |
Keep scones in a sealed container to maintain freshness and prevent drying. Avoid refrigeration which can dry them out. | Up to 2-3 days |
| Freezing ❄️ | Ensure scones are fully cooled. Wrap individually in plastic wrap or freeze-safe bags. Thaw at room temp before reheating. | Up to 3 months |
| Reheating 🔥 | Warm scones briefly in a hot oven (about 150°C) for 5-7 mins to refresh that freshly baked charm. | Immediate consumption |
Freezing is a baker’s best friend when it comes to extending shelf life without sacrificing quality. Many bakers prepare big batches and freeze portions, knowing that a quick reheat brings their beloved scones back to near-original perfection.
One quirky bit of trivia: did you know the name “rock scones” comes directly from their rough and bumpy appearance, which—if you let them cool too long—can be mistaken for actual rocks (ouch!). So bite them while they’re warm and watch out for those delicious surprises inside.
In the overall scheme of things, these humble British rock scones hold a unique place in traditional baking history and continue to charm palates in 2026. Their simplicity, broad adaptability, and those comforting pockets of dried fruit make them an enduring favorite. Thanks so much for joining this baking journey—may your oven be hot, and your scones rock on! 🍵🎉
Stay curious and keep experimenting—there’s something magical about baking that few other kitchen adventures can match. 💫
Can I substitute margarine for butter in rock scones?
While you can use margarine, real butter is highly recommended for the best crumbly texture and richer flavor that defines traditional rock scones.
My rock scones turned out hard and tough, what went wrong?
Most likely overmixing the dough or baking too long. Mix just until combined and watch the baking time closely to avoid tough, rock-like scones.
Is it possible to freeze rock scones and for how long?
Absolutely—after they cool completely, wrap them tightly in plastic and freeze for up to 3 months. Reheat in the oven before enjoying.
What can I do if I don’t have self-raising flour?
Use plain flour but add 2 teaspoons of baking powder per 225g of flour to mimic self-raising properties.
Can I add nuts to my rock scones?
Definitely! Chopped nuts like walnuts or almonds add wonderful crunch and flavor. Add them alongside the dried fruit when mixing.
