

There’s nothing quite like biting into a piece of perfectly smooth and creamy homemade fudge—that luscious texture, the rich chocolate melting in your mouth, the sugary bliss just right. Yet, let’s be honest, not all fudge lives up to the dream. Many of us have wrestled with gritty, chalky, or overly sticky batches that leave our taste buds—and patience—disappointed. If you’ve been on that rollercoaster, dreaming of smooth, velvety fudge that’s effortless to make, you’re in for a real treat. The secret? Mastering the sweet alchemy of sugar crystallization and temperature control with an easy, flexible fudge recipe that guarantees that melt-in-your-mouth perfection every time!
This guide dives deep into everything you need to know about making luxurious homemade sweets that impress. From foundational ingredients and precise methods to exciting flavor twists, it’s time to bring out your inner candy magician. You might even turn this classic dessert into your next holiday staple or gift-giving marvel. Let’s unwrap the magic of creamy, dreamy fudge that’s as fun to make as it is to devour.
Key insights to keep in mind:
- 🎯 Perfect fudge hinges on reaching the precise soft ball temperature (235–240°F) for smooth texture.
- 🧈 Full-fat sweetened condensed milk is your best friend—no added sugar and zero grainy texture!
- 🍫 High-quality semi-sweet chocolate chips make a huge difference in taste and consistency.
- 🌰 Nuts, extracts, and mix-ins open endless doors for creative flavor play.
- ❄️ Proper storage keeps your homemade candy fresh for weeks (or months if frozen!).
what makes fudge smooth and creamy instead of gritty?
Getting that silky, creamy fudge isn’t just luck—it’s science paired with a bit of kitchen artistry. One of the biggest culprits behind grainy fudge is sugar crystallization gone rogue. When sugar molecules clump together during cooling, they form those coarse crystals nobody wants knocking around in their candy. Avoiding this perfectly is the craft of fudge-making pros and newbies alike.
The key to mastering this starts right at the ingredient list and temperature control. Instead of relying on plain sugar as the main sweetener, full-fat sweetened condensed milk comes into play—it’s got sugar already dissolved into a smooth syrup, which prevents those bothersome crystals from forming. Plus, the creamy dairy fats in it keep things luxuriously soft.
Precision when heating can’t be stressed enough. You need to hit the “soft ball stage,” usually between 235 and 240 degrees Fahrenheit. At this point, a tiny bit of syrup dropped in cold water will form a flexible ball, signaling it’s ready for the next steps. If the temperature creeps too high, you risk overcooking and getting hard or crumbly fudge. Too low, and it won’t set right, resulting in a sticky mess.
Another overlooked trick is not stirring the hot syrup once you’ve covered the pot briefly. This step allows sugar crystals to steam away from the sides and reduces the chance of gritty chunks in your final product. Once you pour that warm syrup over your chocolate and start beating, the action breaks down any lurking sugar clusters and helps create that glossy, smooth texture everyone craves. But be careful—beat just until the gloss dulls. Overmixing can toughen your fudge.
Most families have a fudge story—whether that’s grandma’s old-school recipe or a nostalgic holiday tradition. And trust me, once you crack the code of smooth fudge, it’s like upgrading from dial-up internet to fiber optics—you never want to go back.
which ingredients are essentials in an easy homemade fudge recipe?
Keeping your fudge recipe simple with just a few powerhouse ingredients is where magic happens. Here’s the lowdown on what matters most:
- 🧈 Full-fat sweetened condensed milk: This ingredient is the unsung hero that guarantees a creamy, smooth base without needing extra sugar. Avoid low-fat or sugar-free varieties because they won’t set properly.
- 🍫 High-quality semi-sweet chocolate chips: Quality counts here. The fat content and chocolate flavor profile impact the richness and texture. Milk chocolate chips tend to soften fudge too much, while alternatives like carob chips don’t offer the same luscious melt.
- 🧂 Butter: Adds silkiness and richness, smoothing out the chocolate mixture for that perfect mouthfeel.
- 🌿 Vanilla extract: The secret touch that brightens the chocolate and adds warmth without competing flavors.
- 🌰 Optional mixers: Nuts (pecans, walnuts), peanut butter, or extracts for creative twists.
Let’s get a snapshot comparison of some basics for this particular recipe:
| Ingredient 🍫 | Role 🎯 | Tips & Notes ✨ |
|---|---|---|
| Sweetened condensed milk | Provides sugar & creamy fat base | Use full-fat only, no evaporated milk substitutions |
| Semi-sweet chocolate chips | Flavor and texture foundation | Choose quality brands like Dove or Toblerone |
| Butter | Richness and silky texture | Cut into pieces, softened but not melted |
| Vanilla extract | Enhances flavor depth | Pure vanilla extract recommended |
Don’t let the simplicity fool you! This minimal yet powerful ingredient list is the springboard for the most luscious homemade dessert. By mastering these, your fudge will come out velvety every time, no matter the occasion.
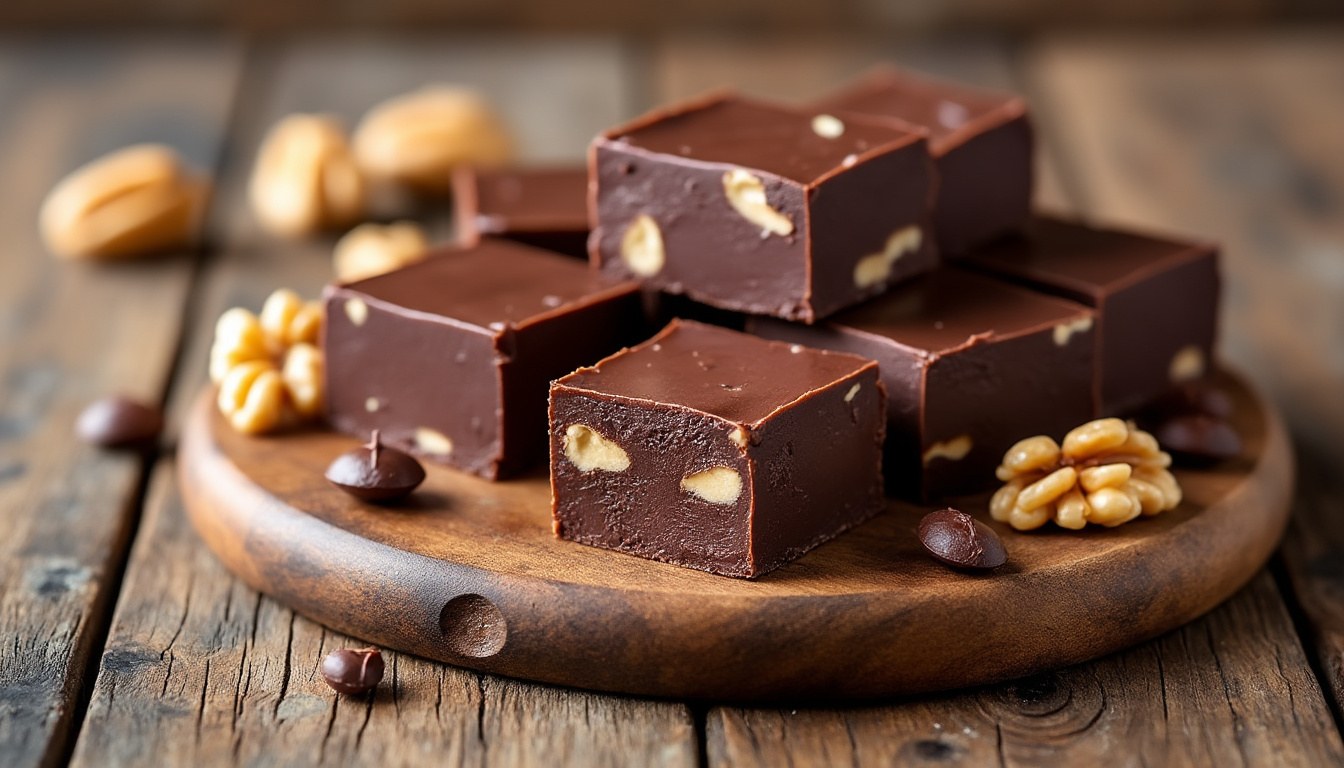
how to add amazing flavor variations to your fudge?
Once your base is nailed down, the world of fudge recipe experimentation opens wide. The beauty of fudge lies not just in its texture but how it can be customized to blow your mind (and everyone else’s) with flavors. Whether it’s a holiday party, a heartfelt gift, or a personal treat, there’s a flavor variation that’ll match your mood.
Here’s a bunch of crowd-pleasers and funky twists to try:
- 🌰 Nutty delights: Stir in about 1/2 cup of toasted nuts such as pecans, walnuts, or almonds for crunch and bold flavor. Pro tip: swapping part or all of the vanilla extract with a nut extract (like almond or hazelnut) can turbocharge that nutty goodness.
- 🤍 White chocolate fudge: Swap the semi-sweet chips with white chocolate chips to get a creamy, sweet take. For extra fun, make a marbled batch combining half white and half semi-sweet chips; then swirl with a toothpick or butter knife for a pretty pattern.
- 🌿 Mint chocolate fudge: Vanilla out, peppermint in! Replace the vanilla extract with fresh peppermint extract (about 1 teaspoon) for a festive, refreshing punch.
- 🥜 Peanut butter fudge: This one uses a slightly different mix (think 14 ounces sweetened condensed milk, 1/2 cup creamy peanut butter, 12 ounces white chocolate chips, plus vanilla). It’s a delightfully creamy and peanutty departure from classic chocolate.
- 🍬 Mix-in madness: Why not toss in mini marshmallows, crushed peppermint candies, or toffee bits? It’s a flavor and textural boost that takes your fudge into next-level territory.
Adding new tastes is like inviting friends to a party — every ingredient brings a fun personality. The versatility of homemade fudge means that you’re never limited to chocolate-only sweets. Fancy exploring fruity, caramel, or coffee spins? Check out rich cakes like coffee walnut cake or the classic Mary Berry chocolate cake for inspiration to pair alongside your fudge treats.
easy steps to make your own creamy fudge at home
Ready to go from dreaming to doing? Making smooth, creamy homemade sweets like fudge isn’t rocket science if you follow these pro tips and steps carefully. Here’s a streamlined process to keep on hand:
- 📋 Prepare ahead: Line a baking pan with parchment paper for easy removal. Chop any nuts, toast and cool them if using.
- 🔥 Heat & boil: Butter a heavy pot, pour in your sweetened condensed milk and sugar (if required by recipe). Bring to a rolling boil over medium heat, stirring constantly.
- ⏱️ Soft ball stage: Cover the pot for 1 minute, then remove and clip on your candy thermometer. Let boil untouched till the syrup hits 235–240°F (soft ball stage). The syrup should form a flexible ball in cold water.
- ➕ Combine & beat: Remove from heat. Stir in butter and vanilla but don’t stir immediately; let it sit a minute. Pour syrup over chopped chocolate. Beat with a mixer until the fudge loses its glossy shine and looks matte (about 5-7 minutes).
- 🌈 Add mix-ins: Fold in nuts, peanut butter, or favorite extras gently.
- ❄️ Set & chill: Pour fudge into pan, cover, and refrigerate for at least 5 hours or overnight until firm.
- 🔪 Cut & store: Use parchment paper to lift fudge out, slice into neat squares. Store in airtight containers in the fridge or freeze for longer life.
This entire process feels super rewarding, especially when that first bite melts perfectly soft in your mouth. If you want more inspiration on homemade desserts that pair effortlessly with fudge, don’t miss this ultimate chocolate fudge cake. Its richness complements fudge beautifully for double the indulgence.
how to troubleshoot common fudge mishaps?
Even the best fudge makers face challenges—fudge can be notoriously tricky! But don’t sweat it; most problems have straightforward fixes. Here’s a rundown of common pitfalls and solutions for silky homemade sweets.
- 😩 Fudge won’t set: This usually happens when fats or sugars aren’t balanced properly or if you used low-fat condense milk or incorrect chocolate chips. Always follow the recipe closely and avoid improvising with ingredient substitutes!
- 🌾 Grainy or gritty texture: Sugar crystallization is the villain here. Make sure to wipe sugar crystals off the sides of the pan after boiling by covering it briefly, and don’t stir while the syrup boils. Be careful not to overbeat once you start mixing the chocolate in.
- 🍬 Sticky or too soft fudge: This can be due to undercooking or not reaching the exact soft ball temperature. Use a precise candy thermometer or the cold water test!
- 💧 Seizing chocolate: If chocolate and syrup mix suddenly harden, ensure chocolate isn’t overheated or moisture didn’t get in. Use dry bowls and utensils for best results.
Ultimately, patience and exact measurements—plus these tips—will have you rolling out luscious fudge that looks and tastes like it belongs in a candy shop window. For those curious about alternatives, here’s a handy video on how subtle ingredient swaps impact the final fudge consistency.
In the overall scheme of things, crafting your own rich and creamy fudge is a sweet adventure worth savoring. It’s a simple recipe that packs a punch when mastered—it’s smooth, versatile, and a guaranteed crowd-pleaser. Thanks for sticking with this guide. Now it’s time for you to whip up some magic in your own kitchen and delight your friends and family with glorious, homemade sweets. 🍫✨ Stay inspired and happy candy-making!
Can I use a candy thermometer, or is there another way to tell when fudge is ready?
While a candy thermometer is the most precise tool for measuring the soft ball stage (235-240°F), you can perform a cold-water test: drop a spoonful of syrup into cold water; if it forms a soft, pliable ball, it’s ready for the next step.
Why did my fudge come out grainy and how can I fix it?
Graininess usually happens because sugar crystals form during cooling. Prevent this by covering the pot briefly during boiling to wash down crystals on the pan’s sides and avoid stirring while boiling. Beat the fudge mixture only until it loses gloss.
What’s the best way to store homemade fudge?
Store fudge in an airtight container in the refrigerator for 2-3 weeks. For longer storage, wrap pieces in plastic wrap, place in a freezer bag, and freeze for up to 3 months. Separate layers with parchment paper to avoid sticking.
Can I use different types of chocolate in my fudge?
Yes! Semi-sweet, milk, or dark chocolate can all work well, but keep the total ounces the same. White chocolate is softer and may benefit from mixing with semi-sweet to improve texture.
Is there a dairy-free way to make fudge?
You can try sweetened condensed coconut milk as a substitute for dairy-based condensed milk, but results may vary. It’s best to test small batches when trying dairy-free versions.
