

Looking for a truly delightful baking adventure? Rock cakes are where the charm of tradition meets the ease of homemade goodness 🍋🧁. These crumbly, sweet little fruited buns have been a cozy staple of British teatime for ages, delivering a rustic appeal that’s just irresistible. Crafted with simple, everyday ingredients and a hint of warm mixed spice, rock cakes offer a crumbly texture with a gentle citrus zing that makes your kitchen smell like a festive dream. Whether you’re a seasoned baker or just experimenting with traditional recipes, this rock cakes recipe is your golden ticket to creating a comforting snack that’s perfect for any occasion. Ready to dive into the enchanting world of baking rock cakes? Let’s break down everything you need to know to whip up these scrumptious treats!
In brief:
- 🍋 Rock cakes are easy-to-make traditional fruited buns with a crumbly texture and sweet, spiced flavors.
- ⚡ Made from simple ingredients like flour, caster sugar, cold butter, dried currants, and candied lemon peel.
- 🔥 Baking at 350°F (180°C) delivers golden, lightly crisp buns perfect for tea time or snacks.
- 🧈 Best enjoyed slightly warm with butter, honey, or jam, showcasing their tender crumb.
- 🥄 Versatile dough that can be customized with chocolate, different dried fruits, or vegan swaps.
- 📦 Store in airtight containers for up to 3 days, or freeze to enjoy whenever the craving hits.
what makes traditional rock cakes so special and easy to bake?
If you’ve ever wondered why rock cakes, sometimes called rock buns, have stood the test of time, it’s all about their delightful simplicity and rustic vibe. Imagine biting into a golden, crumbly bun dotted with chewy currants and tangy bits of candied lemon peel—each mouthful a cozy hug from the past. What really sets these apart? The texture is rough, uneven, and beautifully “rocky,” giving them a charmingly homemade look that says “I baked this with love.”
Their recipe is no fuss—think basic pantry staples like flour, sugar, and butter, with dried fruit adding bursts of sweetness. Unlike fussy cakes, they don’t require complicated processes or fancy equipment; all you need is an oven and some enthusiasm. The use of cold butter rubbed into flour creates those flaky pockets that rock cakes are famous for, while a dash of mixed spice offers warmth without overwhelming the natural sweetness.
And here’s a little extra: during World War II, these humble buns gained popularity because they were egg and sugar savvy—perfect for rationing times! 👏 Nowadays, they’re still loved for their quick turnaround and comforting flavors.
Trying these in your kitchen brings a bit of history, nostalgia, and a whole lot of yum. Plus, the recipe’s versatility means you can tailor them to your taste. Fancy a twist? Swap currants for cranberries or mix in some chocolate chips for a kid-friendly treat. Just be sure to keep butter cold and handle the dough lightly so you don’t lose that quintessential crumbly texture.
Curious about perfect pairing? These buns shine brightest with a steaming cup of tea or coffee—which reminds me, if you’re loving easy baking adventures, check out this rock scones recipe—another classic that’s equally charming!
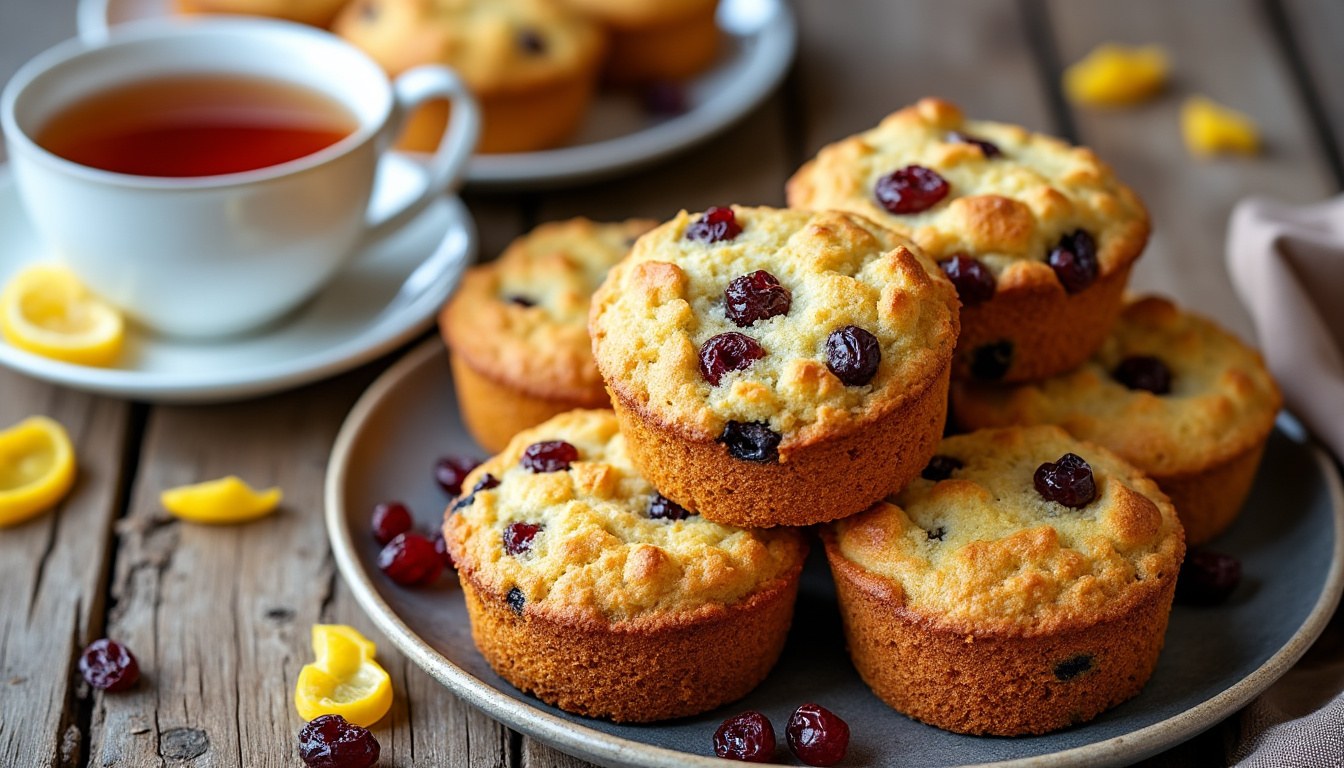
which ingredients turn a simple dough into irresistible rock cakes?
The magic behind every batch of rock cakes lies in their thoughtfully balanced ingredients. Nothing too fancy, just basics that combine to create something truly special. Here’s the rundown on what makes them tick — and why each component is essential:
- Flour: Opt for all-purpose or pastry flour to keep the texture tender yet crumbly.
- Caster sugar: It dissolves quickly, giving just the right amount of sweet without graininess.
- Baking powder: Leavens the buns, providing that delightful lightness inside.
- Mixed spice: A subtle blend of cinnamon, nutmeg, and cloves that gently warms up the flavor profile—think festive but understated.
- Salt: Enhances the sweetness and balances the taste beautifully.
- Cold butter: The hero of the crumbly texture! Chopped and rubbed into flour, it creates those flaky bits that make every bite melt in your mouth.
- Egg: Acts as a binder and adds richness.
- Milk: Moistens the dough just enough without making it sticky.
- Vanilla extract: An aromatic lift that complements the fruity and spiced notes.
- Dried currants and candied lemon peel: The sweet and tangy gems studding the cakes, offering chewy bites and zesty brightness.
Don’t underestimate the importance of technique here—keeping butter cold is a non-negotiable rule. Melted butter results in heavy, dense rock cakes rather than the satisfyingly crumbly ones everyone adores. Rubbing butter quickly into the flour mimics traditional pastry-making methods and seals the deal on that signature texture.
If experimenting piques your interest, try swapping dried currants with raisins, sultanas, or even chopped dried apricots. Oh, and here’s a fun fact 🥳: replacing a quarter of the flour with cocoa powder and tossing in chocolate chips instead of peel turns these into delightful chocolate rock cakes — perfect to wow the kids or your chocolate-lover friends! For various baking tips and inspiration, the best mini ovens guide can help you pick equipment that makes your baking journey smoother!
table: key rock cakes ingredients and their roles
| Ingredient 🍰 | Role in recipe 🔧 | Flavor/Texture impact 🌟 |
|---|---|---|
| Flour | Forms dough base | Tender yet crumbly structure |
| Caster sugar | Sweetness agent | Smooth sweetness that dissolves well |
| Baking powder | Leavening | Light, airy texture |
| Mixed spice | Flavor enhancer | Warmth, subtle aromatic depth |
| Cold butter | Texture creator | Flaky, buttery crumb |
| Dried currants & candied lemon peel | Flavor & texture add-ins | Sweet-chewy and citrus zing |
how to master baking rock cakes in your oven like a pro?
Baking rock cakes is as fun as it is rewarding, and getting that perfect crumbly yet moist balance is a game-changer. When baking at home, it’s crucial to control a few factors to ensure top-notch results every single time.
First things first, preheat your oven to 350°F (180°C). Using a versatile oven that heats evenly is key—modern compact ovens hold a charm of their own but if you want the lowdown on the best options out there, this best mini ovens roundup is a goldmine for advice. Next, line your baking tray with parchment paper or silicone mats to keep the cakes from sticking and to help with even browning.
The mixing process is where technique meets instinct. Start by combining all your dry ingredients well—flour, sugar, baking powder, salt, and mixed spice. Then comes the cold butter, which you want to rub quickly into the mixture using your fingertips, sunning your hands fast to keep it chilled. When it looks like coarse breadcrumbs, you’re golden! This step creates the ‘rocky’ texture and buttery layers.
Don’t rush while folding in your dried currants and candied lemon peel—they need to be evenly dispersed without warming the dough. If the dough feels too sticky or warm, pop it in the fridge for 20-30 minutes before baking.
Shape your dough into roughly six portions—about 95-100 grams each works perfectly. Just plop them onto your lined tray, no need for perfect spheres; these are charmingly irregular. Bake for about 20 minutes until they develop a light golden crust. Remember, timing can vary by oven, so sneak peeks are encouraged!
Come out of the oven, let cool for a few minutes, and feel free to slather with butter or honey immediately, while still warm. Baking rock cakes is a joy to share too; nothing beats seeing family or friends savor one of these rustic treats with tea in hand. For more sweet-tooth inspiration, you might want to try this fairy cake recipe—another traditional British delight!
how to serve and creatively enjoy your homemade rock cakes?
Once those rock cakes come out of the oven, their versatility truly shines. Serve them warm, straight from the oven for that buttery melt-in-your-mouth sensation. Little pats of softened butter, a drizzle of honey, or some strawberry jam complement these buns beautifully, turning snack time into a mini celebration.
Pairing rock cakes with beverages is almost a ritual. They are utterly perfect alongside a steaming cup of British tea or bold coffee, balancing their crumbly texture and sweet notes. Want to add a touch of freshness? A side of a simple fruit salad will contrast wonderfully with the richness of these sweet buns.
Feeling adventurous? Here’s some fun ideas to jazz up your traditional rock cakes magic:
- 🍫 Cut rock cakes in half, toast lightly, then spread cream cheese and marmalade for a tangy-sweet combo.
- 🍯 Crumble over yogurt topped with fresh berries to create a crunchy parfait bursting with flavor.
- 🥄 Serve as a breakfast treat with a scoop of clotted cream and honey.
- 🍳 Use small rock cakes as a base for miniature dessert sandwiches with curd or lemon zest cream.
Learning how to bake rock cakes not only enhances your baking skills but opens doors to countless sweet-tooth delights. If you’re into wholesome snacks, exploring this healthy flapjack recipe is a great next step in your homemade baking journey.
how to store, freeze, and keep your traditional rock cakes fresh?
Nothing’s more frustrating than homemade baked goods losing texture or flavor after a day or two—but rock cakes can be your secret weapon for lasting homemade goodness if stored correctly. Once cooled, place them in an airtight container at room temperature. They’ll stay fresh for up to three days, retaining that perfect crumbly softness you worked hard to achieve. 🏡
Need to stretch the love longer? Freeze your rock cakes! Individually wrap each in clingfilm or foil, then stash in a freezer-safe bag. When cravings hit, thaw at room temperature for a couple of hours or overnight in the fridge, then warm gently in a 300°F (150°C) oven for 5-7 minutes. This brings back their irresistible freshly baked aroma and texture, making your baking stash feel brand new!
Here’s a quick storage checklist for easy reference:
- 🌡 Store room temp in airtight container for 3 days.
- ❄ Freeze individually wrapped for up to 3 months.
- 🔥 Reheat in oven for a fresh-baked experience.
Handling and reheating properly can easily elevate your rock cakes to star treat status whenever you want them. Staying organized with storage is especially helpful when you bake batches to share or gift. If you cherish traditional bakes, exploring easy tray-bake recipes can expand your homemade repertoire with minimal fuss!
table: recommended storage methods for rock cakes
| Storage Method ❄️ | Duration ⏳ | Tips for freshness 🍀 |
|---|---|---|
| Room temperature, airtight container | Up to 3 days | Keep out of direct sunlight and moisture |
| Freezing, individually wrapped | Up to 3 months | Wrap tightly to prevent freezer burn |
| Reheating in oven | 5-7 minutes at 300°F (150°C) | Preheat oven; reheat gently to restore texture |
Can I substitute currants with other dried fruits in rock cakes?
Yes! Raisins, sultanas, dried apricots, or cranberries work wonderfully as alternatives, each bringing unique sweetness and texture to your rock cakes.
Why must butter be cold when making rock cakes?
Cold butter ensures flaky pockets in the dough, leading to the characteristic crumbly texture. Melted butter results in denser, less desirable buns.
Is it possible to make vegan rock cakes?
Absolutely! Use plant-based butter and flaxseed egg substitutes, ensuring vegan-friendly sugar and candied peel. Texture might differ slightly but remains delicious.
How can I adjust the moisture in my rock cakes?
Add a splash more milk or cream cautiously to moisten the dough, but avoid adding too much to prevent losing the ‘rocky’ shape and crumbly texture.
What makes rock cakes different from scones?
Rock cake dough is stiffer and shaped roughly with two forks or by spoonful, resulting in smaller, crumblier buns compared to rolled and cut scones.
In the end, there’s something timelessly rewarding about baking rock cakes—those humble little fruited buns carry history, warmth, and so much flavor. Whether you’re baking solo or sharing with friends and family, rocking the traditional recipe—as well as experimenting with creative twists—makes every bite satisfying. Thanks for joining this baking escapade; hope your kitchen smells as heavenly as one filled with rock cakes fresh from the oven! 🍰✨ Keep that oven warm and those spoons ready; the next delicious baking adventure is just a recipe away.
