

Looking for a dessert that’s both elegant and surprisingly simple? Poached pears might just be your new go-to fruit dessert 🍐. They blend simplicity with sophistication in a beautiful way, making them perfect for any occasion from casual brunches to chic dinner parties. This fruit dessert idea highlights the magic of the poaching technique, coaxing out the natural sweetness and tenderness in pears with a fragrant, spiced syrup. Not only do poached pears score high on style, but they also rank as a healthy dessert option that feels homemade and heartfelt. Curious about how to pull off this classic with flair? Let’s dive in!
Here’s what this article covers at a glance:
- 🍏 The basics of poached pears and what makes them a timeless elegant dessert.
- 🔥 Step-by-step guidance for a simple cooking process anyone can master.
- 💡 Brilliant tips on how to choose your pears and craft your poaching liquid.
- 🍴 Creative serving ideas that turn humble fruit into a stunning dish.
- ❓ FAQs clearing common doubts about poached pears.
what makes poached pears an elegant and healthy dessert choice?
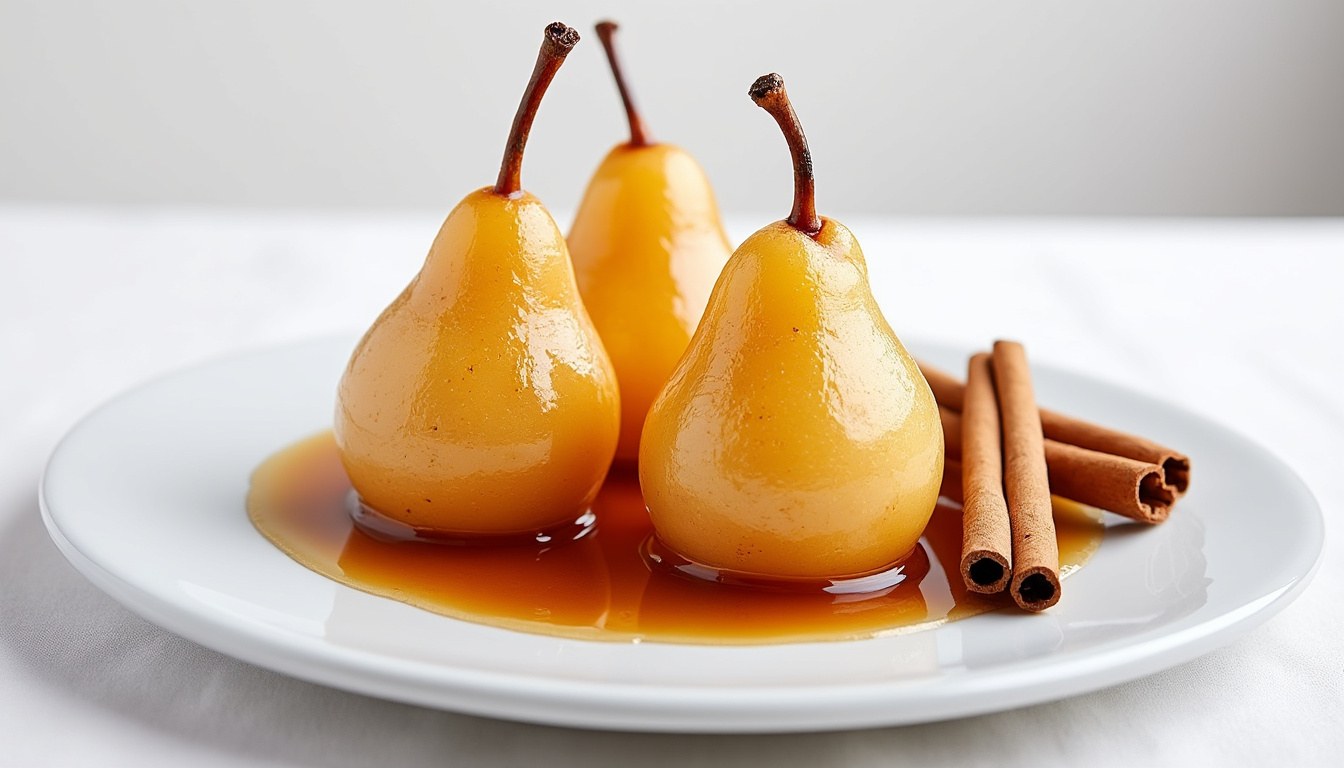
Poached pears are the epitome of refined simplicity. Imagine tender pears bathed in a lightly spiced, sweet syrup that complements their natural flavors without overwhelming them. Unlike heavy cakes or rich puddings, poached pears offer a lighter alternative packed with fresh fruit goodness, perfect when seeking a healthy dessert 🥰.
One of the beauties of this pear recipe lies in its adaptability. You can infuse the poaching liquid with white wine, honey, vanilla, or a medley of spices such as cinnamon sticks, star anise, or ginger. This combination elevates the dessert’s aroma, filling your kitchen with a warm, inviting scent that hints at the treat to come. Whether simmered gently in wine or a fragrant tea, the pears retain their juicy texture and gentle firmness while soaking up the complex flavors.
Being made almost entirely from fruit and natural sweeteners means poached pears fit well into a wholesome, homemade dessert repertoire. Plus, the poaching technique softens even underripe pears, transforming them into tender jewels perfect for a gluten-free, egg-free, and nut-free dessert that many can enjoy. Swap out honey for maple syrup, and you have a charming vegan dessert to show off at your next gathering. 🐝🍁
Poached pears offer more than visual appeal; they deliver a multi-sensory experience. The satin-like softness of the pears, the sweet-spice perfume wafting through the air, and the silky syrup’s gentle kiss on the palate combine into a simple cooking masterpiece. It’s no wonder these elegant desserts grace tables of chefs and home cooks alike.
how to master the simple cooking process of poached pears
Getting the perfect poached pears starts with great technique paired with the right ingredients. The beauty is, it’s surprisingly straightforward, making it an accessible fruit dessert for cooks of all levels.
The first step is selecting the pears — firm varieties such as Bartlett or Anjou work wonders since they hold shape well during cooking without turning mushy. Avoid overly soft Bosc pears; they’re prone to falling apart in the poaching liquid.
Here’s a quick rundown of the process:
- Prepare the poaching liquid: Use a combination of white wine (or a good quality non-alcoholic alternative), water, sugar, honey, lemon zest, fresh ginger, cinnamon stick, and a split vanilla bean. Bring to a simmer in a heavy-bottomed pot like an enameled Dutch oven for even heat distribution.
- Peel and add pears: Peel the pears carefully to reveal their pristine flesh and drop them gently into the simmering liquid. To keep them submerged and prevent discoloration, place a heatproof plate or parchment circle over the pears.
- Slowly poach: Let the pears simmer gently for about 20 minutes, turning occasionally to ensure even cooking. The pears should become tender enough to pierce easily but still intact—soft, juicy, and bursting with absorbed flavors.
- Reduce syrup: Once the pears are done, remove them carefully, then increase the heat to boil down the poaching liquid into a thick, glossy syrup. Drizzle this liquid lavishly over the pears before serving to boost sweetness and add that stunning shine.
This method is not just effective but fun to do. Watching the pears transform from firm and rigid to soft, nectar-infused jewels is oddly satisfying. And in just about 30 minutes, you’ve crafted a fruit dessert that feels fancy but was a breeze to make. Just what busy cooks crave! 🍳✨
what are the best serving ideas for poached pears to wow guests?
Poached pears shine on their own, but where’s the fun in holding back? They’re stage-ready stars when plated creatively, teasing all your senses.
Here are some show-stopping ways to serve this elegant dessert:
- 🍨 With vanilla ice cream: A classic pairing—the warm pears and cold creamy ice cream create a contrast that’s irresistible.
- 🍫 Drizzled with chocolate or salted caramel sauce: For those who adore decadent toppings, these sauces add richness and depth.
- 🧀 With mascarpone or creme fraîche: The tangy creaminess balances the syrupy sweetness, creating an indulgent bite.
- 🥗 In a salad: Try sliced pears atop bitter greens like frisée with crumbled blue cheese and toasted walnuts for a savory twist to your fruit dessert.
- 🥧 On tarts and pastries: Lay thin sliced poached pears on a bed of pastry cream in a crisp tart shell, making a gorgeous, easy-to-make treat. For a foolproof tart crust recipe, consider checking out this link for tips on complementary sauces and crusts that elevate your dessert game.
Each serving choice transforms the basic poached pears into something uniquely yours, whether you’re after something light and fresh or rich and luxurious. These pears pair beautifully with so many dessert ideas and are flexible enough to shine in multiple roles.
how to store and preserve poached pears for lasting enjoyment?
Planning ahead is a lifesaver, especially when it comes to homemade desserts. Poached pears give you plenty of room to prepare in advance without losing any charm or taste.
If you want to keep them fresh:
- 🥶 Refrigerate: Store pears in an airtight container immersed in their poaching liquid for up to a week. This keeps them moist and flavor-packed.
- ❄️ Freeze: For longer storage, place pears and the syrup in a freezer-safe container for up to 2 to 3 months. When thawed, they remain tender and delicious.
For those who love preserving seasonal bounty, poached pears can also be canned. Fill sterilized jars with the pears and their poaching liquid (skip the syrup reduction step), wipe rims, and process in boiling water for about 15 minutes for safe sealing. These jars store well for several months at room temperature and double as delightful homemade gifts during festive seasons 🎁.
Besides convenience, this flexibility means there’s always an elegant dessert ready to impress, even on your busiest days. Also, fun fact: preserving poached pears has been a popular tradition in French cuisine since the 18th century — talk about timeless charm! 🕰️
pick the perfect pear and perfect poaching liquid for your pear recipe
Choosing the right pear can make or break this dessert’s texture and flavor. Firm pears such as the Bartlett and Anjou varieties are preferred because they keep a tender bite without dissolving. Bosc pears, often praised for baking, sometimes surprise with mushiness when poached, so handle with care or avoid them entirely when going for elegance.
The poaching liquid is the real hero that infuses flavor. Common bases include:
| Type of liquid 🍷 | Flavor profile 🍋 | Effect on pears 🌟 |
|---|---|---|
| White wine (e.g. Sauvignon Blanc) | Light, crisp, and fruity with subtle acidity | Creates delicate flavor and pale yellow hue |
| Red wine | Rich, bold, and slightly tannic | Infuses deep ruby color and robust aroma |
| Tea (e.g. Earl Grey or Jasmine) | Floral, citrusy, with subtle astringency | Gives amber hue and gentle perfume |
| Fruit juice (apple, white grape) | Sweet, fresh, and tart | Enhances natural pear taste and soft color |
Spices are the secret agents here — cinnamon sticks, star anise, cloves, and grated ginger add warm complexity that turns simple poached pears into a rich sensory event. Sweeteners like sugar and honey help thicken the poaching liquid into a syrupy drizzle.
Wondering how to tweak flavors? Here’s a quick pro tip: swap honey with maple syrup for a vegan-friendly twist or try infusing the syrup with fresh herbs like thyme for a less conventional but equally sophisticated dessert twist.
Can poached pears be made without alcohol?
Absolutely! Use fruit juice or strong brewed tea like Earl Grey instead of wine. The pears will pick up lovely flavors without the alcohol content.
How long does it take to poach pears properly?
Typically, simmering pears on low heat takes about 20 minutes, but the exact time can vary depending on pear variety and ripeness. The key is tender pears that hold their shape.
Are poached pears suitable for gluten-free diets?
Yes, poached pears are naturally gluten-free, egg-free, and nut-free, making them safe and delicious for many dietary needs.
Can poached pears be stored and reheated?
Definitely! Store pears in their syrup in the fridge for up to a week or freeze for a few months. When reheating, warm gently to retain texture and flavor.
What are some creative ways to serve poached pears?
Try serving them with vanilla ice cream, mascarpone, salted caramel sauce, or as a topping for salads and tarts. This versatility makes them fantastic for any occasion.
In the overall scheme, poached pears strike a perfect balance between elegant presentation and effortless preparation. They’re a testament to how simple cooking methods can highlight natural ingredients into showstopping homemade desserts. Thanks a bunch for sticking around and getting a taste of this wonderful recipe adventure! May your kitchen be forever filled with the sweet aroma of simmering pears and warm spices 🥳🍐.
